Working PSK31 with a X1M and Digimaster Pro3

X1M Digimaster Combo
I recently obtained a Xiego X1M HF radio from OM Rory in Port Elizabeth. Nice package and works SSB out of the box. I took it with me to Parys on a weekend (it was small enough to sneak it into my baggage without the XYL noticing) and working off a 12v/7Ah gelcel battery I managed a few contacts by stringing a piece of wire into a nearby tree. Signal reports were around 57, not surprising as it only puts out 5 watts. Reception was ok but I was slightly bothered by the background noise especially on 40m and I had no way to filter it out or reduce it (see more later).
Remember I was calling QRP or Portable, as I was deliberately working off-grid. I wanted to be able to pack my stuff into a small backpack and carry it with me – not quite RaDAR, yet, but certainly testing the limits of what can be achieved in a light weight package. Thus, getting a 57 report was actually a compliment to me.
To put things in perspective, the X1M is more-or-less a competitor to the Yaesu FT-817. I should say less, because it is a lot cheaper but it also lacks a lot of very nice, often essential features. Like DSP audio filtering. More about that later. But overall you get what you pay for and I am satisfied that it works as advertised.
So my next challenge was to get on the air with digital. My ultimate goal is to work PSK31 off a small 12v battery to some exotic island! I have no idea if that is even achievable but I’m certainly going to test the waters!
Working digital is not strange to me, as I have a permanent station set up at my home QTH. I have two home-built modems that give excellent results, and my Yaesu FT-840 is permanently connected to a Broadgun Travelling Wave antenna (multi-band) about 10 meters above ground. Pushing about 50 watts before the ALC kicks in, I have worked most continents and I’m chasing a DXCC since September 2013. I use my other radio, a Yaesu FT-857 with a 400 watt linear when needed, more for voice but it is also occasionally roped in for PSK use. My logging is done with Ham Radio Deluxe and DM870. Easy and comfortable.
So question 1: Which interface? Scouring the internet I see the Tigertronics SignaLink gets the thumbs-up from many people. Importing into South Africa is technically easy but very expensive in local currency. More so because the Post Office service is non-existent and we have to use couriers which can easily double the actual dollar cost of an interface. But hey, if it is good enough for other hams, it is good enough for me, right?
Wrong! The SignaLink was a big disappointment. Oh, it is an excellent sound card interface, and I have kept mine after playing with it. It works. But it doesn’t have a CAT or any form of computer interface! Sadly it is only a sound card interface with no capability to interface to a serial or USB-serial port. And, guess what, if you run HRD with DM870 it is almost essential that you have that capability. Now I could have added yet another converter box to my collection of cables and boxes. I’m already unpacking several transformers and cables and goodies every time I set up station and one more would not be an issue.
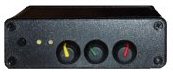
G3ZLP Digimaster Pro3
Just for the record, my Digimaster Pro3 arrived in-country at Customs within 48 hours after placing my order. It was working in my shack within hours after delivery. And the support was even faster. It is an excellent device.
So now we have the pieces of the puzzle on the table – a 5 watt HF radio, a sound card, a serial port (for easy logging) and lots of enthusiasm, but nothing actually connects together! Since there is no real instruction manual for tying together this odd collection of stuff, my approach was to test each component individually before attempting to create fireworks.

X1M RS232
Next I needed to see if the audio quality from the earphone was usable. This was very quick and easy, I simply used a 3.5mm headphone patch cable to go from the “Headphone” socket on the rear of the X1M radio to the “Microphone” socket on the laptop. Running HRD / DM870 I could see some signals on the waterfall display. Audio should be sufficient.

MFJ-561 CW Paddle
But I want to use a single black box (pun not intended) for interfacing, and so out comes the Users Guide for the G4ZLP Digimaster Pro3. Actually, just the pin connections on page 4 for the 6-pin mini-DIN connector. A quick e-mail to Noel (I told you the support is awesome) to confirm that the CAT interface is already at 5 volt, and the soldering of the two interface cables commence.
This next two steps involve pulling out the soldering iron. Step 1: Make a serial cable.

X1M CAT cable
Step 2: Make a sound and PTT cable.
 This time around it is a two-header cable: From the 6-pin mini-DIN connector make a short audio cable for the speaker connector on the back of the radio (two wires), and then make a second cable to the front mic connector on the X1M. I am taking the wires through a ferrite bead scavenged from an old Sony camera cable to reduce possible interference.
Fire up the works and you should be ready to go! I found that the volume controls on the Digimaster Pro3 are quite sensitive, and you should follow the general instructions on the G4ZLP site carefully. My PTT is the virtual COM-port and the transmit audio is set for 0dB gain in HRD. I am including screen shots for reference.
I have one concern that I must mention so far: The little X1M radio does not have AGC or DSP, so the audio quality is very noisy from all the pops and crackles and adjacent signals cause interference. Maybe in a follow-up project we can try to do something about that.
Happy PSK’ing! See you on the QRP bands soon.
73s
de Leon Uys ZR6LU
________
References:
1. Xiego X1m Radio http://www.eham.net/reviews/detail/11065
2. Tigertronics SignaLink http://www.tigertronics.com/
3. Digimater Pro3 by G4ZLP Electronics http://www.g4zlp.co.uk/unified/DigiMaster_ProThree.htm
4. Rory ZS2BL SA Ham Shack http://www.commco.co.za/sarl.htm
5. Yahoo! Groups X1M Tranceiver http://groups.yahoo.com/neo/groups/X1M_QRP-Transceiver/conversations/messages
6. RS232-to-USB Serial 5v Adapter http://www.dfrobot.com/index.php?route=product/product&product_id=72#.UsCCo_uupCq
7. MFJ Enterprises, CW Travel Paddle http://www.mfjenterprises.com/Product.php?productid=MFJ-561
![]()